1. Start with a square, white side up.
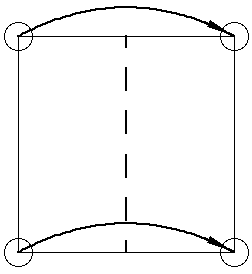
2. The left edge over to meet the right edge. This fold is often called a book fold, because we are folding the model just like we might turn the page of a book.
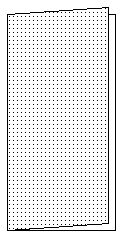
3. This is the result. Now unfold the fold you just made.
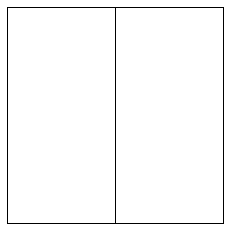
4. This is the result. When you unfold from a previous step, be sure you leave you model was it was before you made the fold. It is easy to accidentally turn the model over or twist it while you are doing the unfold, and that can make it very tough to figure out how to continue. If you ever get stuck, you can always open your model back up to a square and start from the beginning again. Usually on your second try you'll find the place where your hands did more than they were supposed to!
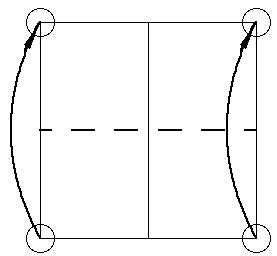
5. Fold the bottom corners up to meet at the top corners. This is also a book fold. Generally, making a book fold is folding part of the model in half so that two edges line up. It doesn't matter whether you are folding left to right, right to left, top to bottom or any other way. Usually, but not always, the name book fold will be reserved for folding a square in half.
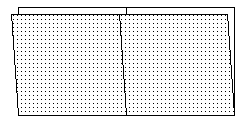
6. This is the result.
Unfold to the previous step.
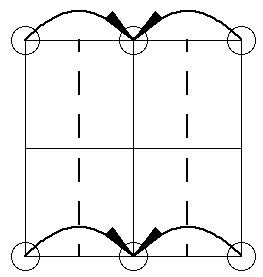
7. Notice that we now have two creases that meet in the center of the square, and that these creases divide our model into four equal parts. Fold the left edge into the middle vertical crease, then fold the right edge to the middle too. This is sometimes called a cupboard fold, but that term is not in wide use.
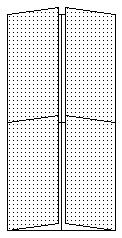
8. This is the result. (perhaps you can see why some people call this a cupboard fold?) Unfold to the previous step.
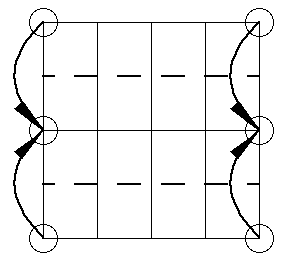
9. Notice that there are four creases running up and down through the model. It is like a small section of a picket fence!Now fold the top and bottom edges into the center horizontal line.
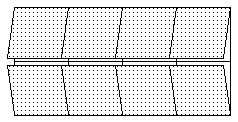
10. Like this.And again, unfold the folds you just made to return your model to the previous step. Of course, you have just made some new creases, so you model can't actually go back to the previous step, but you should open up your creases without changing the orientation of the model.
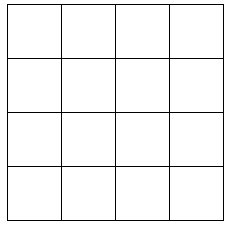
11. This is the result. Notice that we now have a grid of 16 squares. With the white side up (as it should be), all those creases should be valley creases.
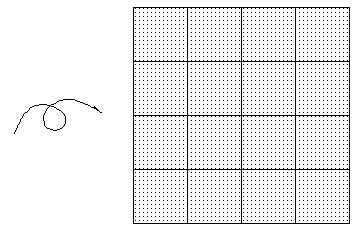
12. Ok, lets turn the model over. All the valley creases in the previous step have now become mountain creases! And we still have the grid of 16 squares.
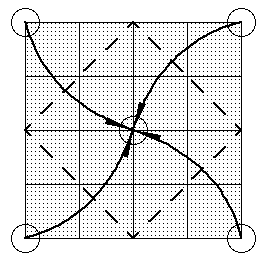
13. Now lets put a bit more folding into each step of our diagrams.
Fold each corner of the square into the center.
Be careful! as it is easy to get lost in the grid.
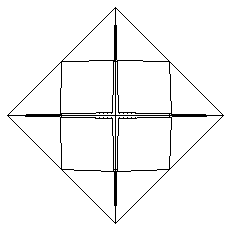
14. This is the result.
All of the corners should meet in the center of the square, and all the flaps should be
the same size. I've drawn the points a bit shy of the center so that you can see a little
bit of the colored side poking through. When you fold this, try to get your points all to
meet. This is very hard to do because the folds you have already made will stretch the
paper slightly. Don't worry about it, just try to get as close as you can. Unfold to the previous step.
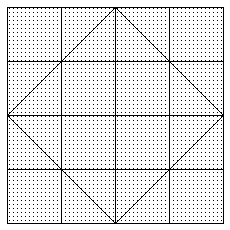
15. This is the result. Notice that in addition to our grid of 16 squares, there is now a diamond formed by the creases we made in the last two steps.
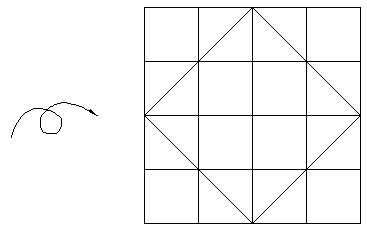
16. Turn the model over.
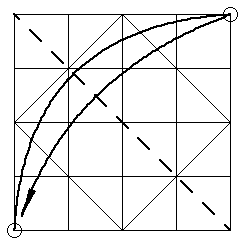
17. Here we are introducing a new kind of arrow. See how the arrow starts at the lower left corner, goes to the upper right corner, and then "bounces" back towards the lower left corner? This style is used to show doing a "fold, crease, and unfold" in one step. Fold the lower left corner to the upper right corner, crease your model, and then unfold it.
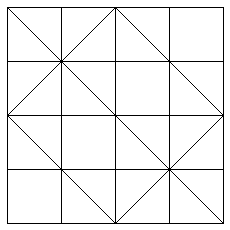
18. This is the result. If you unfolded your model properly, it will look like this. (If it doesn't, spin it so that it does!)
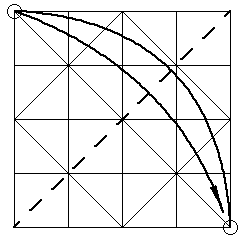
19. Now we are going to do the same "fold, crease, and unfold" with the opposite corners. Fold the lower right corner up to the upper left corner, crease your model, then unfold.
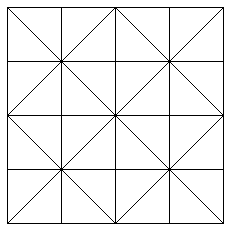
20. This is the result. Notice each of the 16 squares. As you look at your model, notice each of the 16 squares has a crease on only one of its diagonals. Also notice that each square's diagonal crease is in the opposite direction from its neighbors to the left and right. The same is true if you look up and down too! There is nothing to fold in this step, I added it to show you what your model should look like.
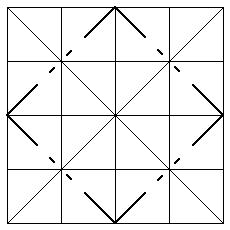
21. There is nothing to fold in this step either.
I wanted to take another look at the creases. Notice that the four heavy fold lines are
different in this step! Instead of being evenly spaced dashes, these have long dashes and
two very short dashes together. This indicates a mountain fold. You don't fold anything in this step, it is here to show you that on your model the four
heavy crease lines should be mountain folds and the rest of the crease lines should be
valley folds. If I had used the valley fold lines, the diagram would have been too
cluttered to easily see what should be what.
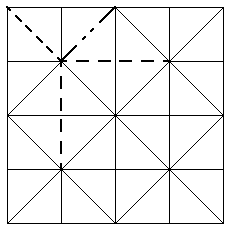
22. Ok, we are almost ready to start folding again. Some of the creases we made be used in the next step, and some won't. This step is to show you which creases will be used in each corner. NOTE: From here on we will not be making any new creases. We are only using some of the creases we have already made. The next step looks pretty complicated, but it is only the creases shown in this step repeated for every corner. I wanted to give you this step to look back on, because I find it easier to concentrate on one corner at a time! At this point you should make sure that the creases in each corner of your model match those shown in this step. I find the easiest way to do that is to verify one corner, then spin the model so that the next corner is the upper left corner, verify it, etc. Once you have done that four times, you have verified all four corners!
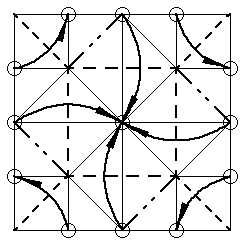
23. Wow! That looks complicated! But don't worry, it is easier to do than it looks! All the creases we have made so far have been to get the model ready to do this step, and to get it ready to do this step easily. I find the easiest way to do this step is to pinch together two opposite corners (notice that the diagonal valley crease in each corner stops after it crosses the smallest square in the corner!) If you have made your other creases nice and firm, the model will want to fold just the way it is supposed to. If this doesn't happen to you, open your model back out and "reinforce" the creases shown (I would recommend going back to the previous step and doing one corner at a time, it is much less confusing that way!) If you pinch like I do, the four corners will be left sticking straight up in the air. Gently fold them all to one side as shown in the next step. Remember!: You are using creases you have already made. If you are making new creases, something isn't lining up right and you should stop and verify your creases and try again! This is a case where what you need to do to your model is pretty simple, but there is no really simple way to show it. The complication is in the diagram (and in reading it), rather than in what your fingers have to do!
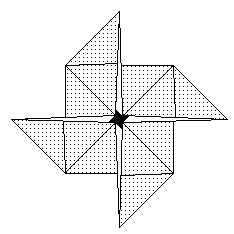
24. This is the final result!
The black spot in the center is really the bottom-most layer (it is white side up).
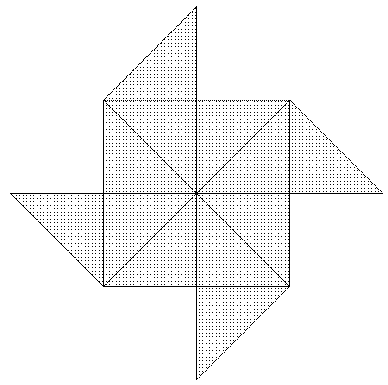
25. What your model should actually look like.